
Following on from our earlier ‘official’ 200th Anniversary Waterloo Refight at Narberth Museum on 18th June,
https://wargamesasp.wordpress.com/2015/06/23/waterloo-200th-anniversary-game-at-narberth-museum/
we packed everything up and transported it down to the Wargames Association of South Pembrokeshire at Pembroke Dock for a ‘proper’ game over the following weekend. This then, is the story of Waterloo Refight No.2:
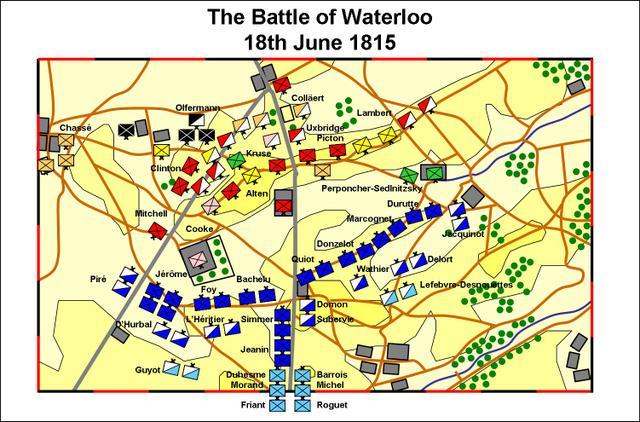
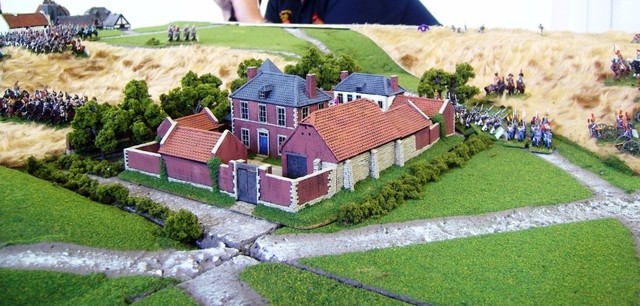
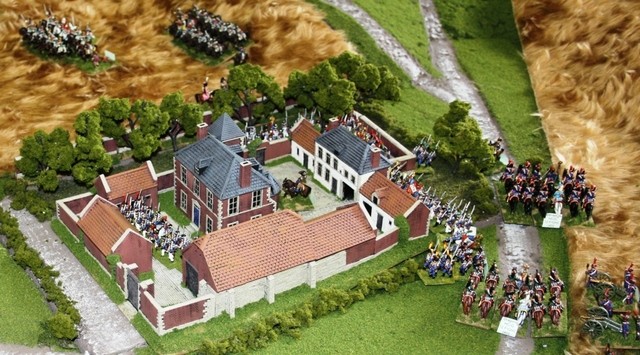
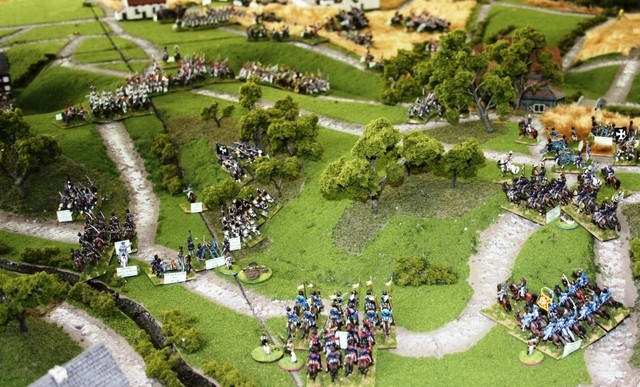
Map of my Waterloo battlefield.
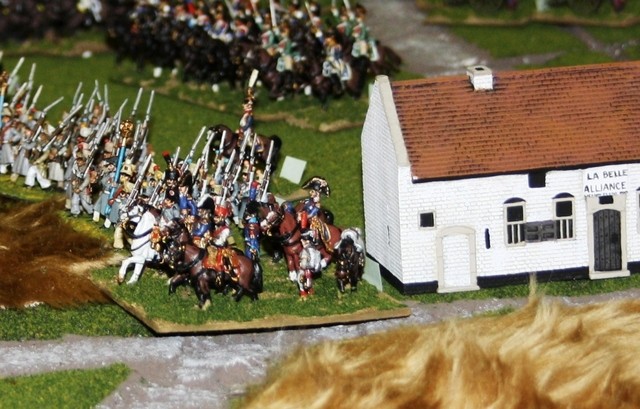
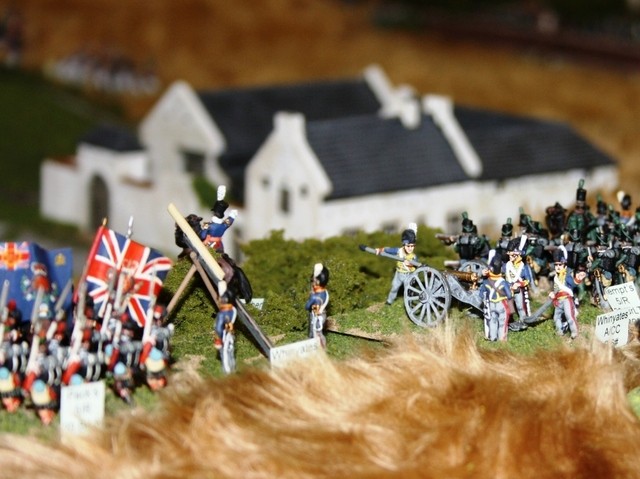
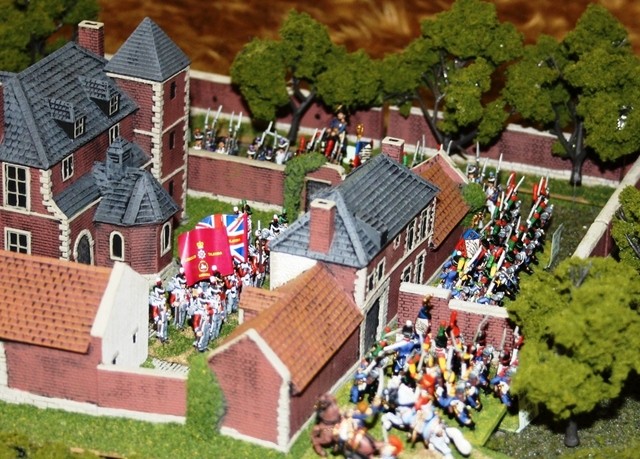
- Having conducted a review of his troops, the Emperor returns to his field headquarters at the inn of La Belle Alliance.

- As the mud dries, the Army waits for orders from the Emperor.
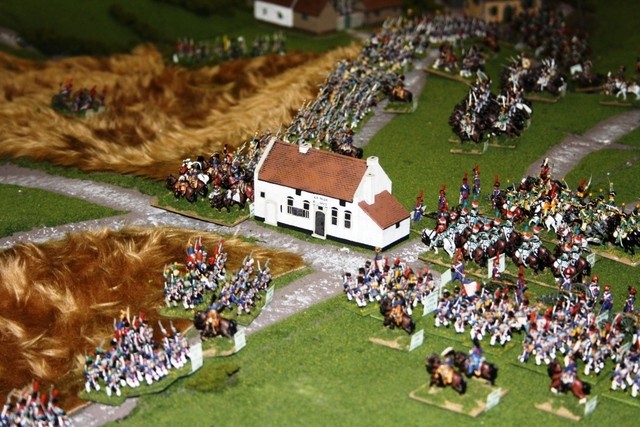
- La Belle Alliance is licensed to sell beer, wine, spirits and a variety of bar snacks.

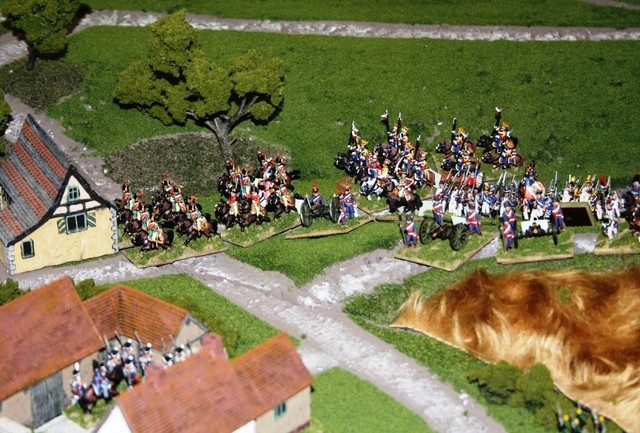
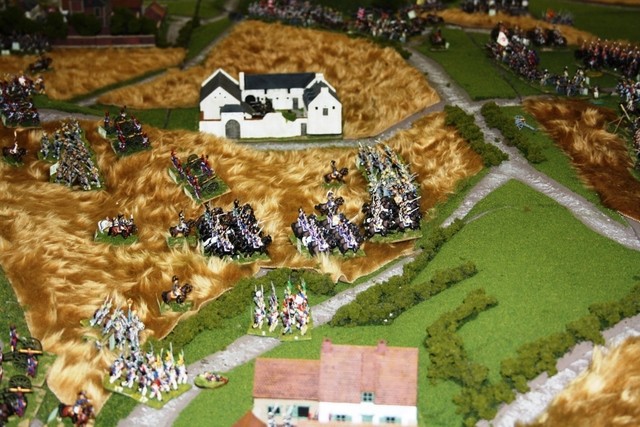
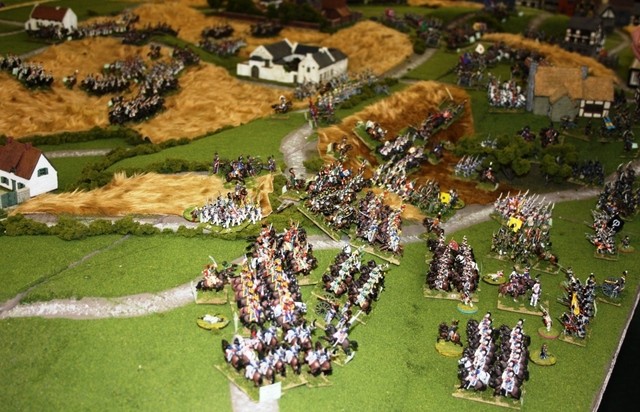
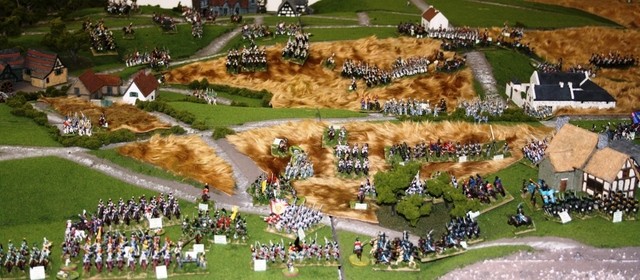
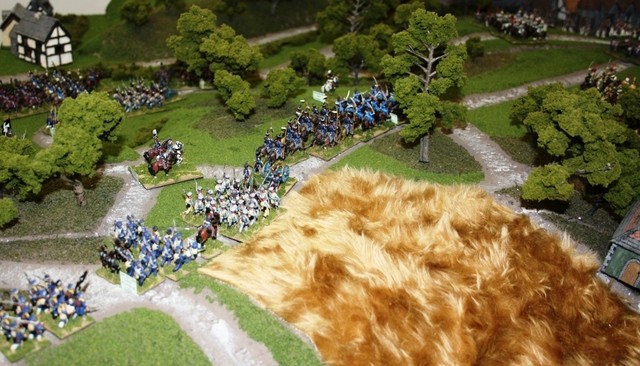
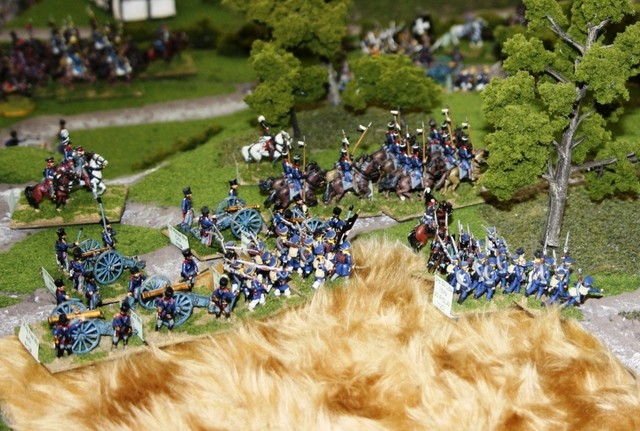
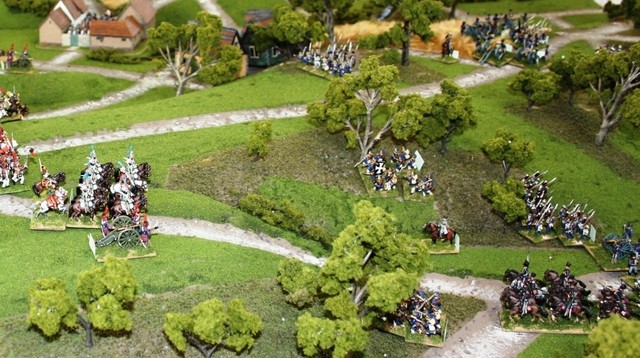
- To the Emperor’s left stands Reille’s 1st Corps. Bachelu’s division stands on the right of the corps, with Foy’s division on their left.
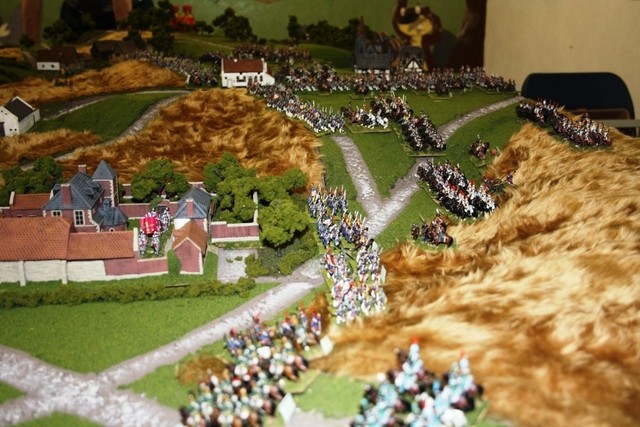
- Jérôme Bonaparte’s Division stands on the left, opposite Hougoumont, while Piré’s cavalry division takes outpost position on the extreme left flank. In rear of Reille’s corps is Kellermann’s 3rd Cavalry Corps and at the back is Guyot’s Guard Heavy Cavalry Division.
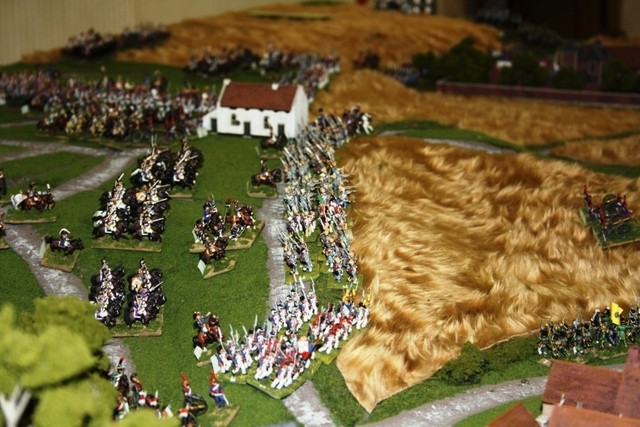
- On the Emperor’s right stands D’Erlon’s 2nd Corps, with four infantry divisions (from left to right): Quiot’s, Donzelot’s, Marcognet’s and Durutte’s. Jacquinot’s light cavalry are on the extreme right, near Frichermont. To the rear of D’Erlon’s corps stands Milhaud’s 4th Cavalry Corps, with Lefebvre-Desnouëttes’ Guard Light Cavalry Division in reserve to their rear.
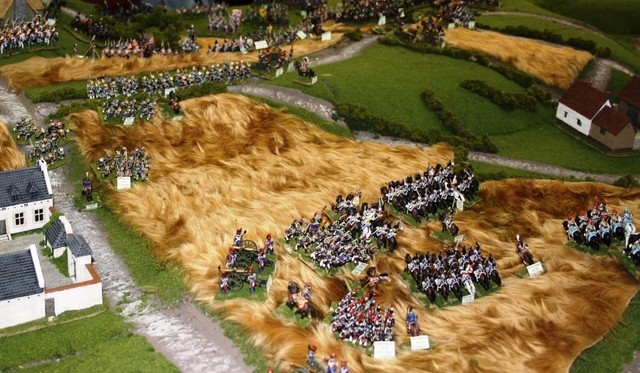
- As the mud starts to dry, 6-pounder artillery batteries begin to move forward, taking position on an intermediate ridge between the French and Allied lines, from where they can closely engage the Allied troops. The heavy reserve 12-pounder batteries also prepare to move forward.
- Donzelot and Quiot prepare to move their infantry forward in concert with the guns.
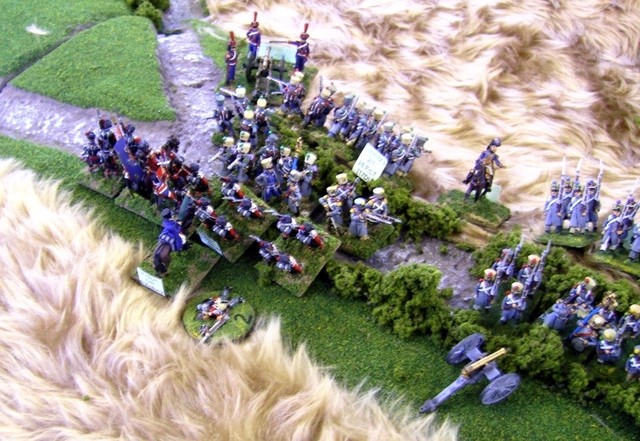
- To the Emperor’s rear, Lobau’s 6th Corps and Drouot’s Imperial Guard infantry, along with the 12-pounder artillery batteries, wait in reserve.
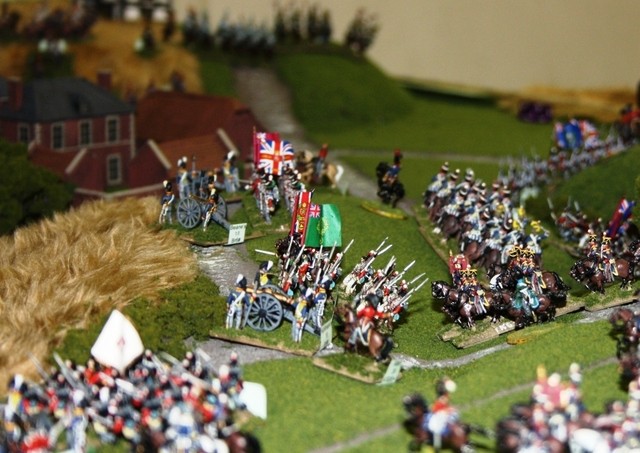
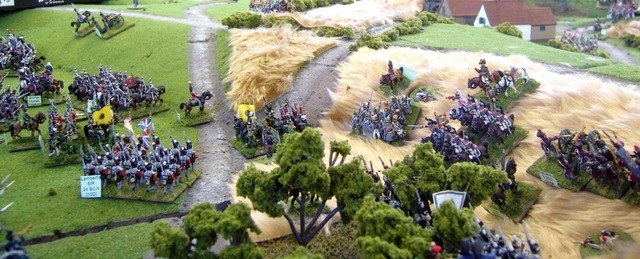
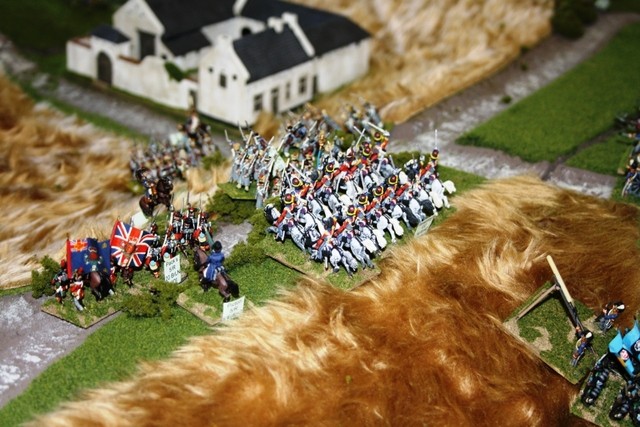
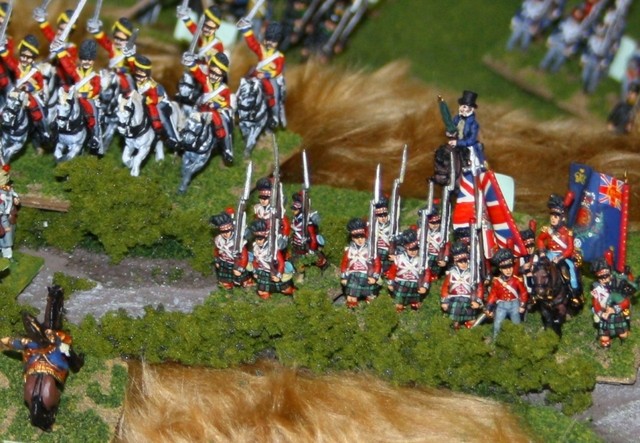
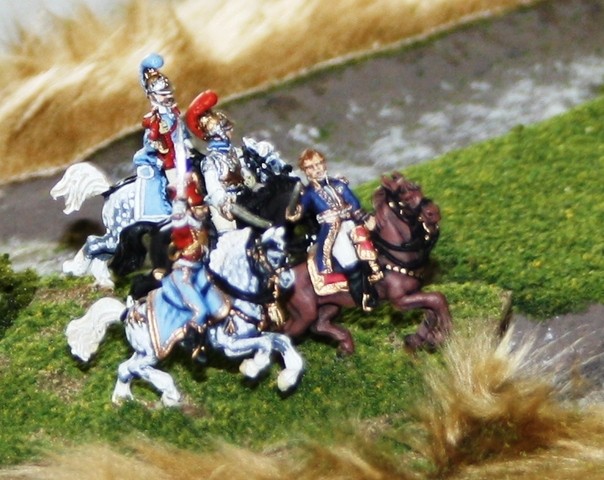
- Across the valley, the Duke of Wellington and his staff observe the French deployment.

- Wellington in close-up.
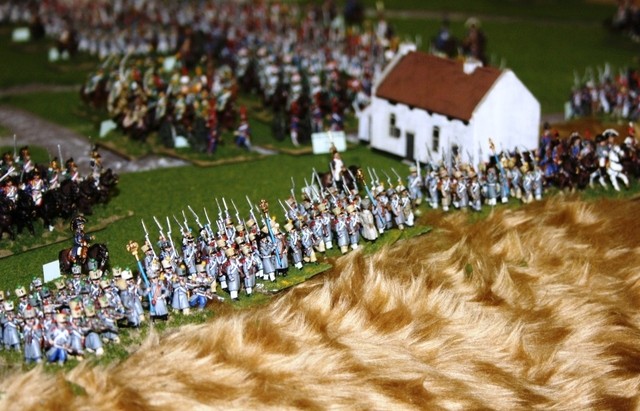
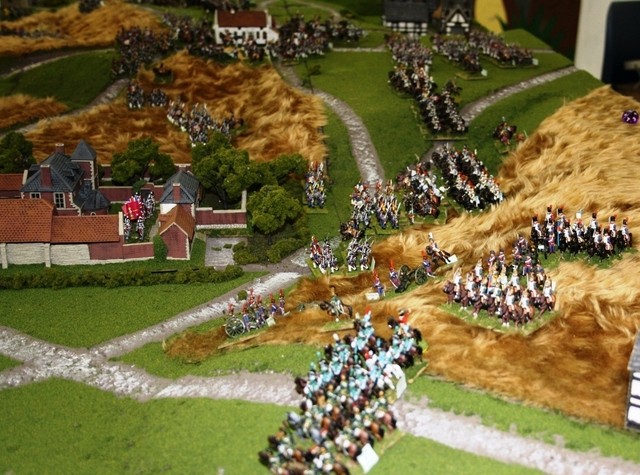
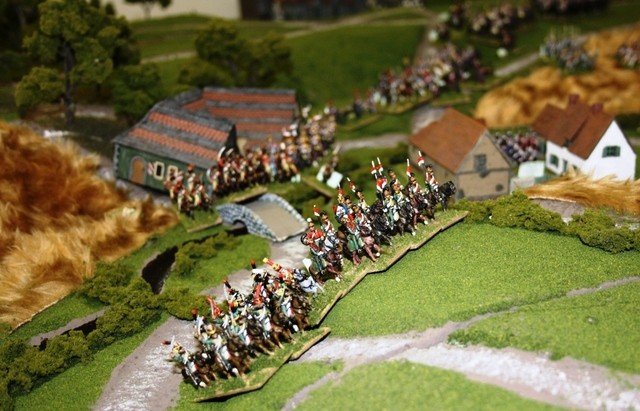
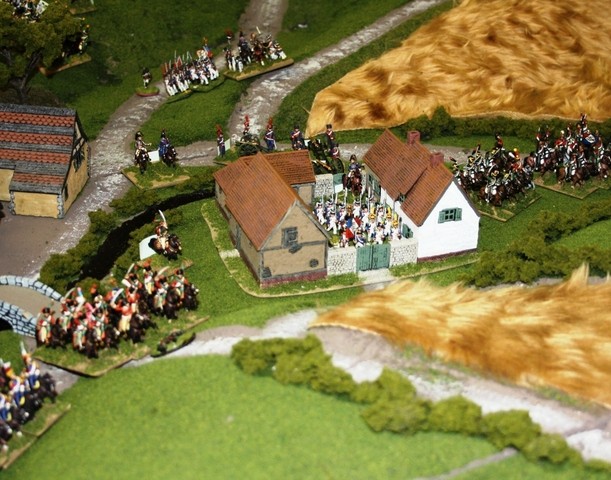
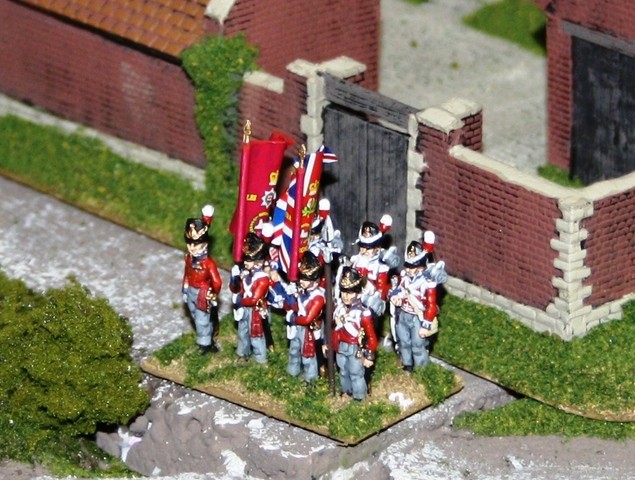
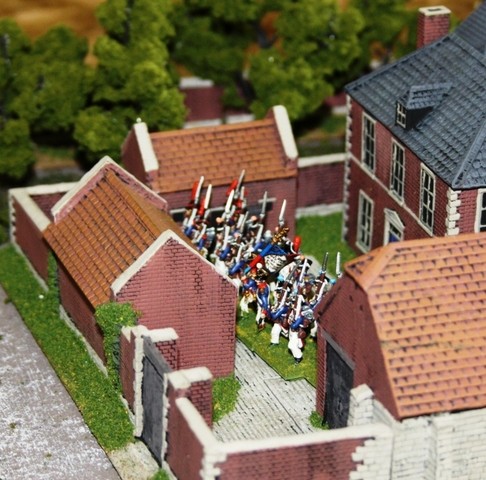
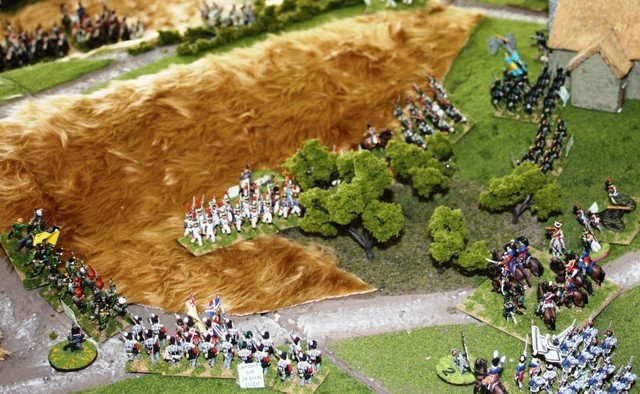
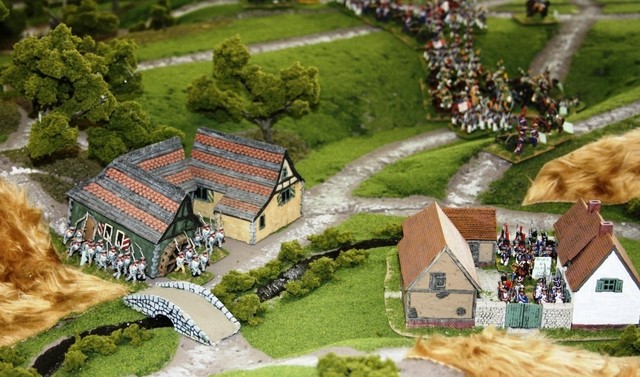
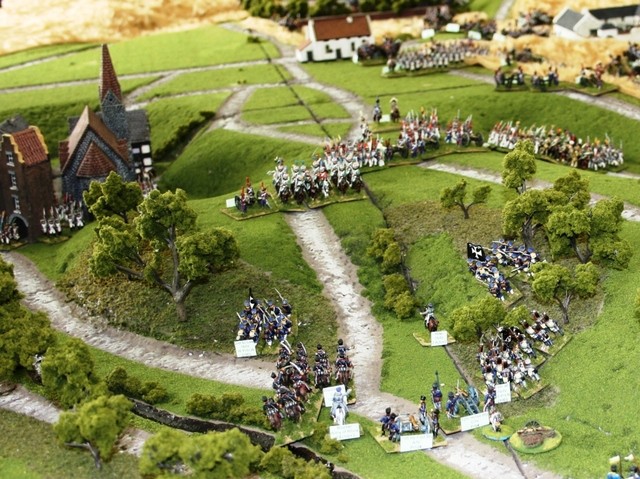
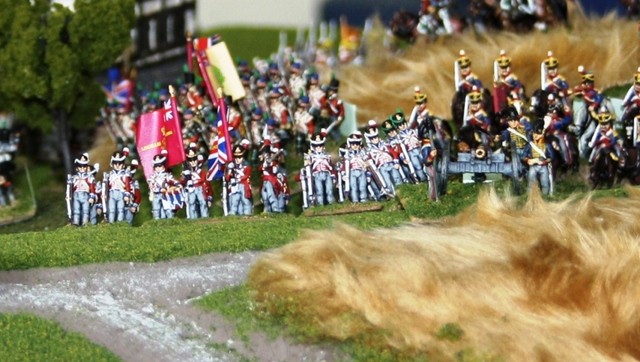
- In front of Wellington, the farm of La Haye Sainte is fortified by elements of Ompteda’s KGL Brigade. Ompteda’s Brigade forms part of Von Alten’s division, which lines the eastern half of the Allied ridge. The western half (i.e. to the right of the road in this photo) is occupied by Picton’s division. To their rear stands the bulk of Uxbridge’s cavalry reserve, as well as Colläert’s Netherlands cavalry division.
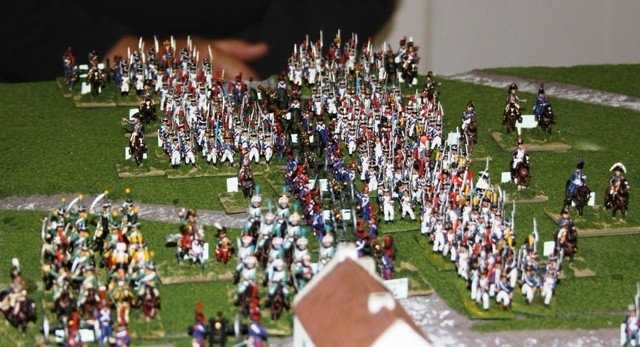
- To Alten’s rear, a great mass of reserves await orders – Clinton’s division, Dörnberg’s and Arendschildt’s light cavalry brigades, the Brunswick Corps and Von Kruse’s Nassauers all wait in the dead-ground behind the ridge.
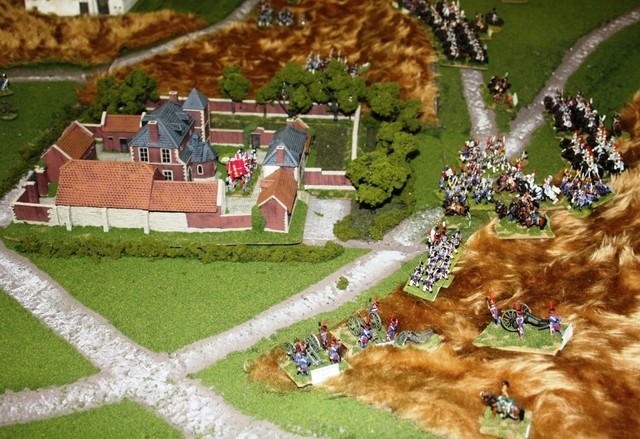
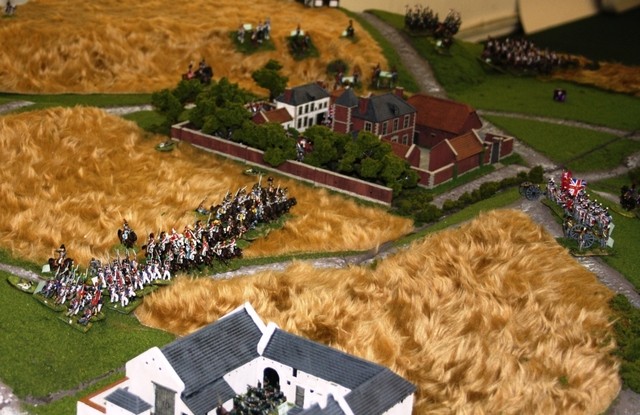
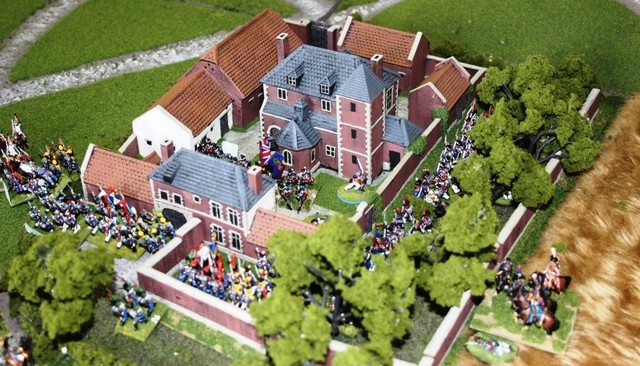
- On Alten’s right stands Cooke’s 1st Division, consisting of Byng’s and Maitland’s Foot Guards Brigades. Elements of Byng’s Brigade are deployed forward, occupying the fortified farm of Hougoumont. On Cooke’s right, Mitchell’s Brigade (part of Cole’s absent division) holds the extreme right-flank.
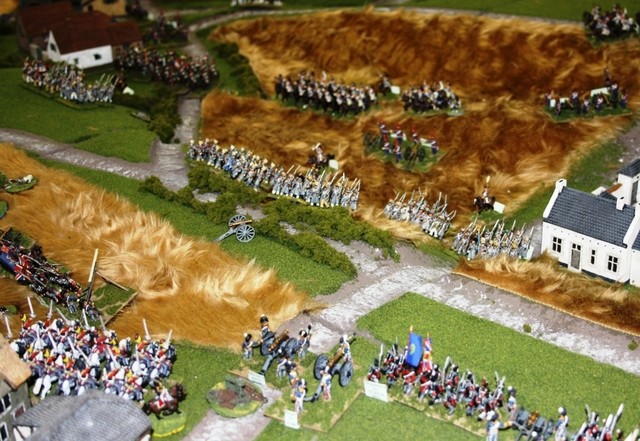
- A little after 11am, the French make their move. As the first guns open fire, Foys’ division moves forward to attack the eastern side of Hougoumont. Bachelu’s division meanwhile makes a demonstration against La Haye Sainte. Behind them, the heavy artillery deploys and begins to fire on the Allied lines.
- On the left, Jérôme’s infantry begin to skirmish with the Guards in Hougoumont. Concerned by the Allied strength behind Hougoumont, the Emperor moves Guyot’s Guard Heavy Cavalry to reinforce Piré.
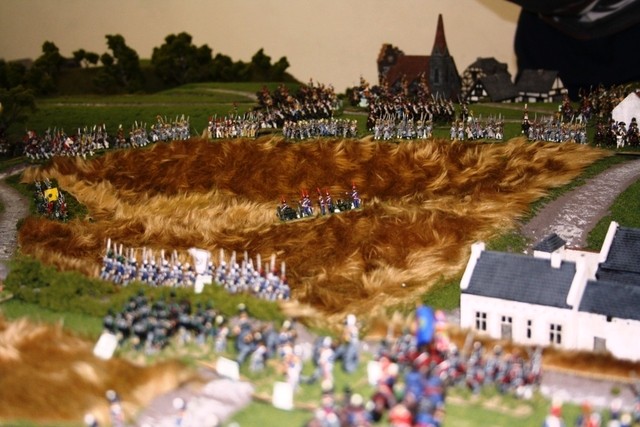
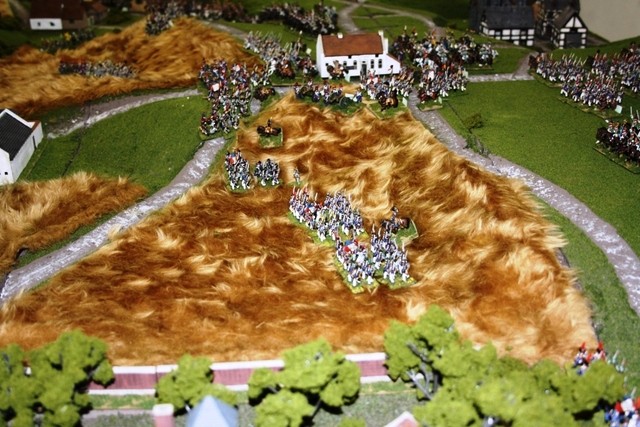
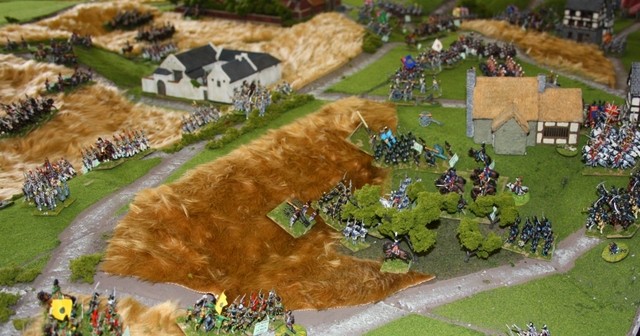
- On the western side of the battlefield, Marcognet’s and Durutte’s divisions move forward to engage Saxe-Weimar’s Brigade. Donzelot’s division meanwhile moves forward to protect the forward gun battery.
- The French artillery quickly dislodges Bijlandt’s Netherlands brigade (with the white flag), which flees to the safety of the orchard behind Mont St Jean farm. The French 12-pounders then make short work of an RHA battery and generally make Picton’s life miserable. Concerned by the weakness of the left wing, Wellington sends the Prince of Orange, with the Netherlands cavalry, Kruse’s Nassauers and the Brunswick Corps, to reinforce that sector of the battlefield.

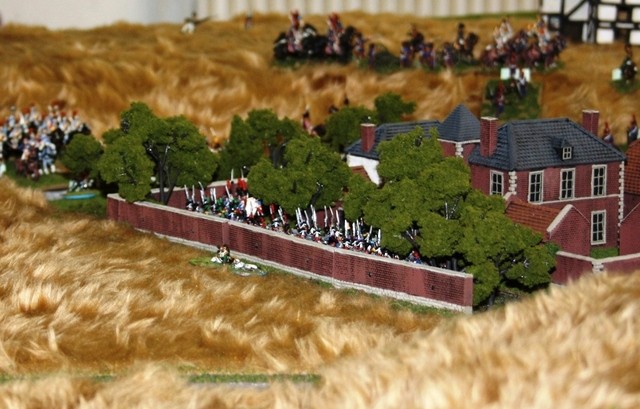
- The 2nd Nassau Regiment’s position among the hedgerows looks increasingly precarious as the mass of French infantry approaches. However, despite heavy fire, the Nassauer’s successfully beat off Marcognet’s first attack. The French attack is then thrown into chaos as Marcognet is captured in the melee!
- However, a mass of horse artillery is building up on the right flank, which soon takes the 2nd Nassau Regiment under fire. The Orange-Nassau Regiment meanwhile, is holding its own in Papelotte-La Haye, despite determined attacks by Durutte’s Division.
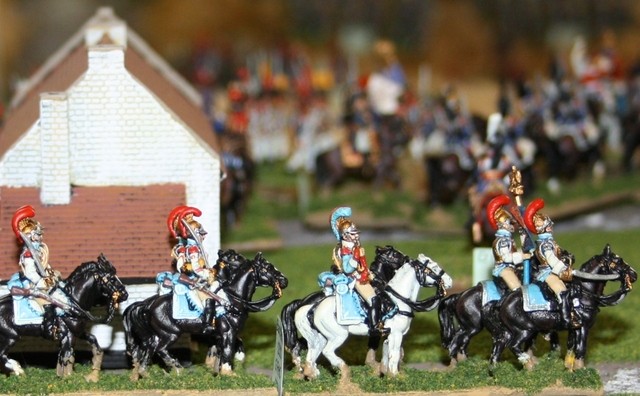
- Seeking to cut the Nassauers off from reinforcement, D’Erlon moves Jacquinot’s cavalry around the flank. The Emperor orders Lefebvre-Desnouëttes’ Guard Light Cavalry to reinforce Jacquinot’s flanking action.
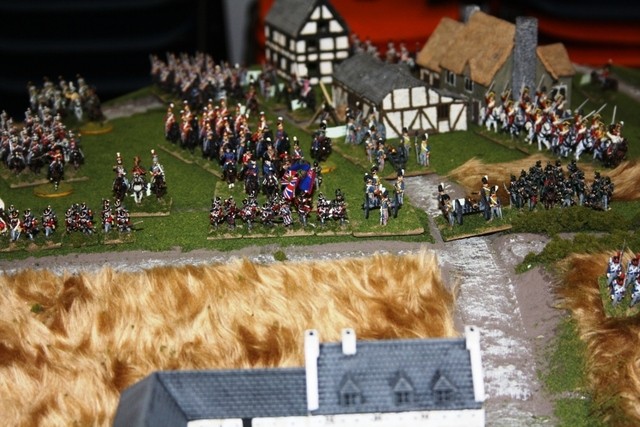
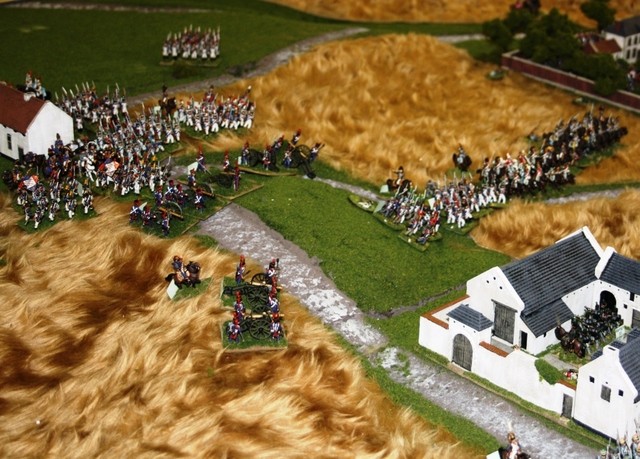
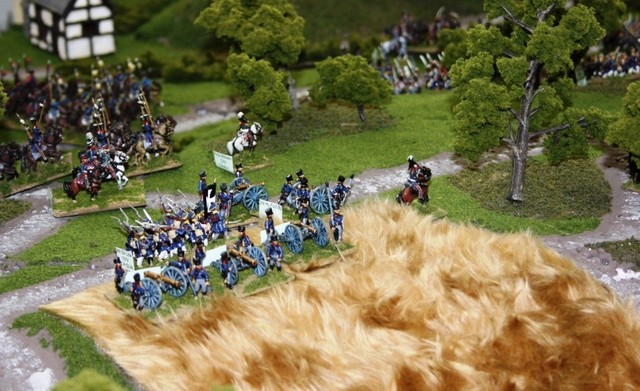
- Now fully deployed, a grand battery of four 12-pounder batteries proceeds to crush Picton’s division under lethally-accurate fire. A further two 12-pounder batteries take Cooke’s division to task, while 6-pounders hammer La Haye Sainte at close range.
- Bachelu’s division waits to take advantage of any sign of weakness among the garrison of La Haye Sainte..
- Batteries (including the Rocket Troop) are deployed from the reserve to replace knocked-out batteries, though they can do little to respond to the French 12-pounders.
- The batteries supporting Alten’s and Cooke’s divisions do somewhat better, doing some damage to Bachelu and Foy’s divisions, though they can do nothing to stop the storm of shot from the French Grand Battery.
- Despite the fire from the ridge, Foy’s division breaks into the Hougoumont estate and launches its assault on the chateau.
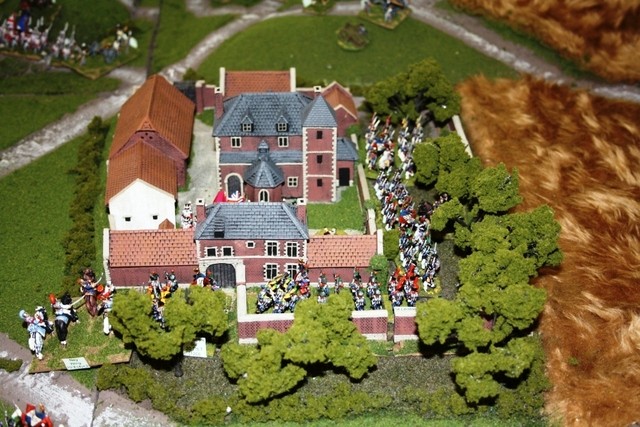
- Marshal Ney personally leads Jérôme’s two Légère Regiments in an assault on the South Gate.
- Undeterred, the Guards pour a withering fire into the attackers.
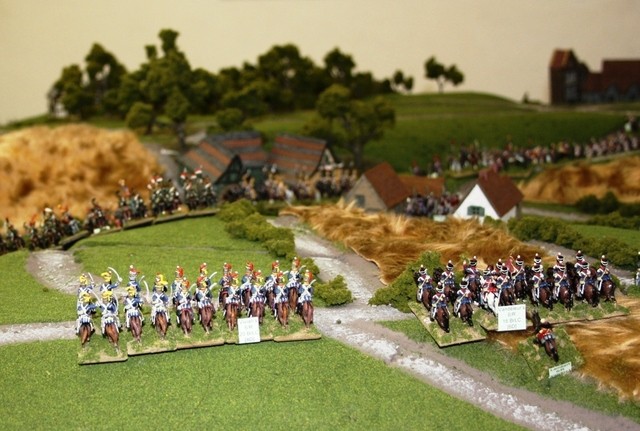
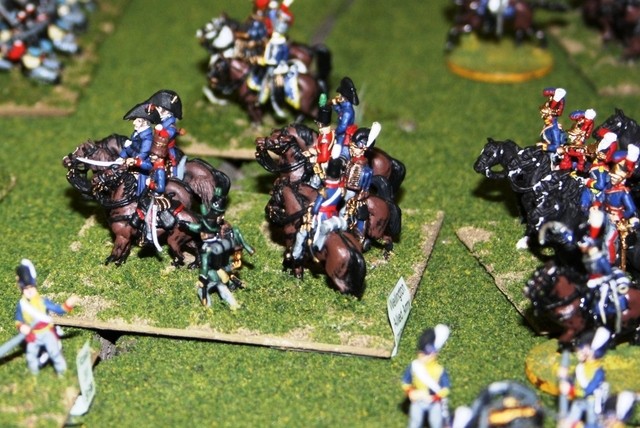
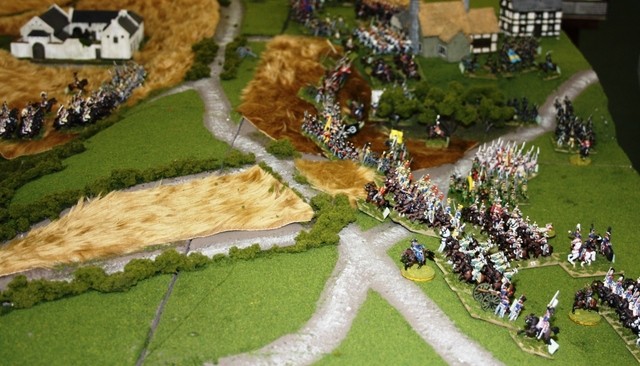
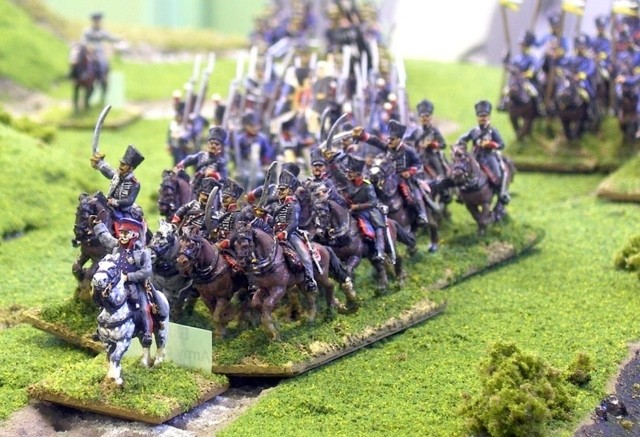
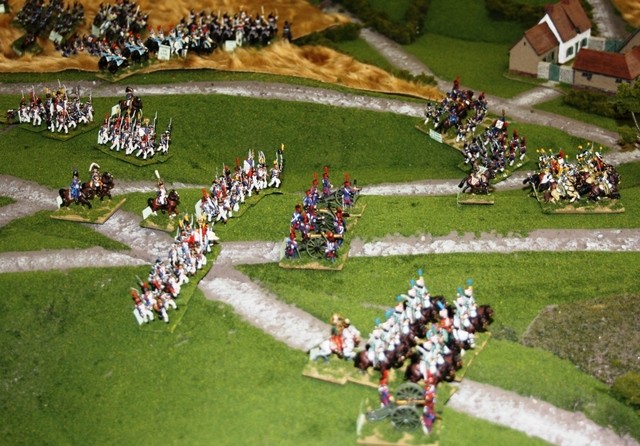
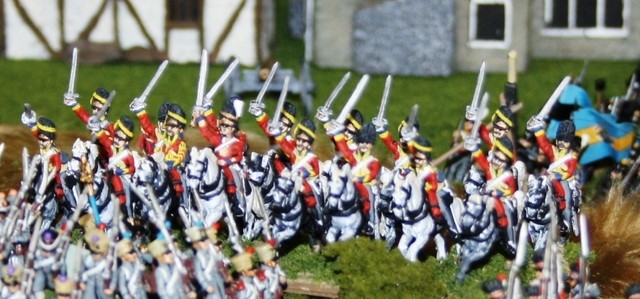
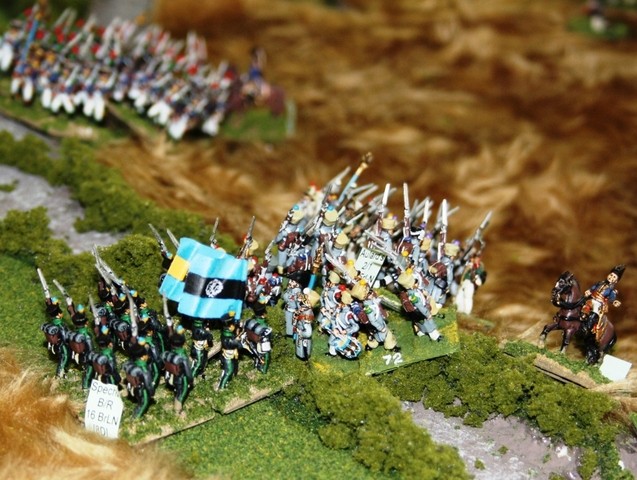
- On the extreme eastern flank of the battle, Vivian’s and Vandeleur’s light cavalry brigades launch a charge on Jacquinot’s approaching cavalry.
- The view a few minutes later: Jacquinot’s cavalry were thrown back across the stream in disorder, though the British cavalry got a rush of blood to the sabre and charged on into the Guard Chasseurs à Cheval… The Chasseurs defeated the ragged charge with ease, though unlike the British cavalry, managed to maintain their order, launching a coordinated charge into Van Merlen’s Netherlands cavalry brigade, who were also then routed, along with a Dutch horse battery. The Guard Chasseurs were finally stopped by Tripp’s Netherlands Carabinier brigade. Both sides withdrew to either side of the ridge to lick their wounds and prepare for the next charge.
In the meantime, the 2nd Nassau Regiment had finally been routed from their isolated position among the hedgerows, the Orange-Nassau Regiment still held fast in Papelotte-La Haye.

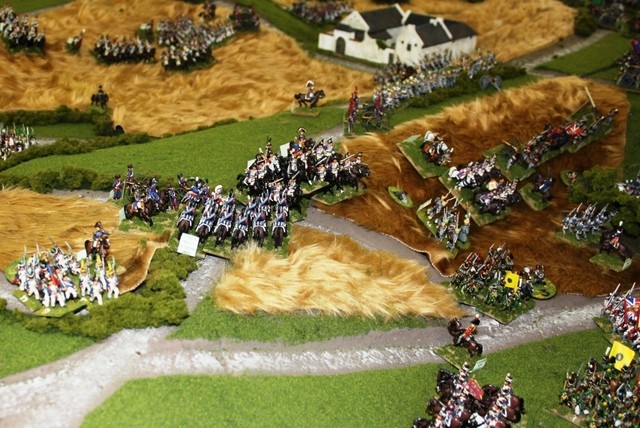
- Jacquinot’s cavalry and the Guard Chasseurs rally on the southern bank of the stream, covered by the Guard Lancers.
- The Prince of Orange and Uxbridge frantically rally the routed British and Netherlands cavalry brigades.
- At the other end of the battlefield, the Guards hold Hougoumont by the skin of their teeth (and a couple of re-roll markers)! Marshal Ney rallies the repulsed infantry of Jérôme’s division.
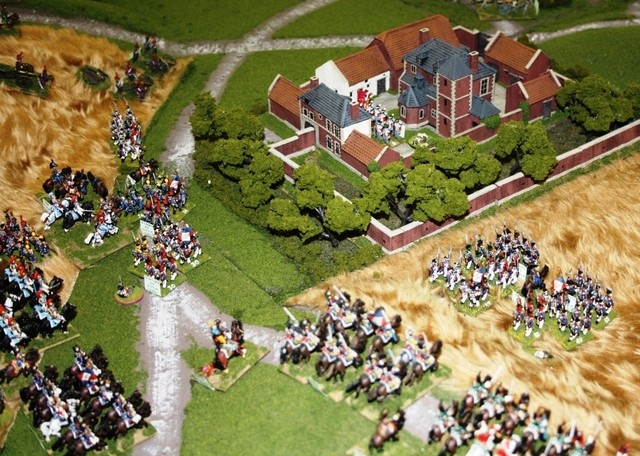
- On the other side of Hougoumont, Foy rallies his greatly-depleted brigades. The Guards cheer themselves hoarse, though they too have been grievously reduced and it was by no means certain if they could repulse a second assault of that magnitude. To add insult to injury, the French artillery now renewed its bombardment of the chateau.
- Picton’s and Lambert’s divisions are really starting to suffer from the incessant long-range bombardment. Wellington orders them to withdraw behind the ridge.
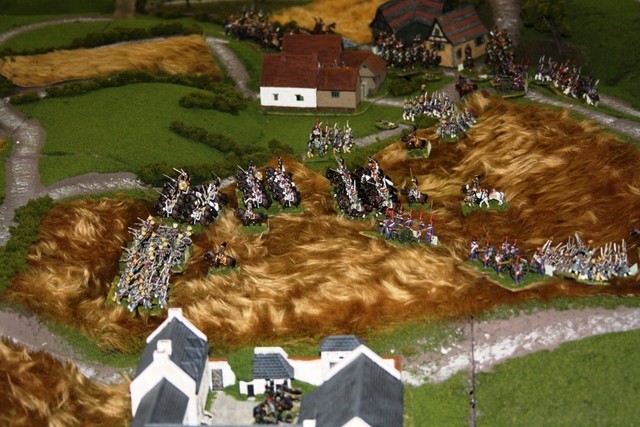
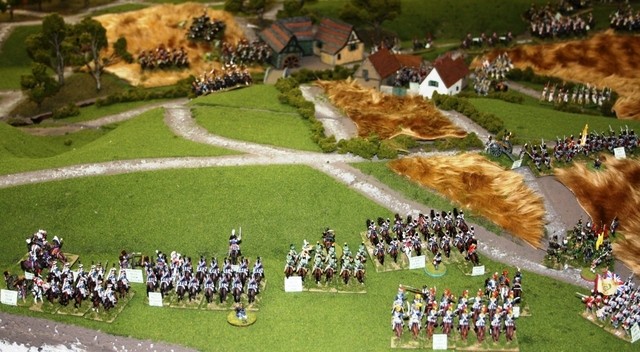
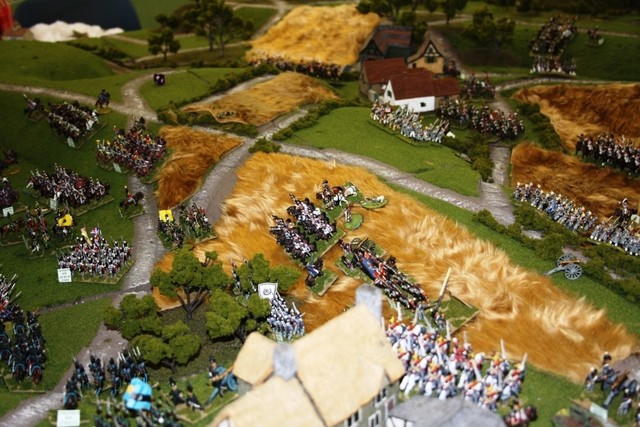
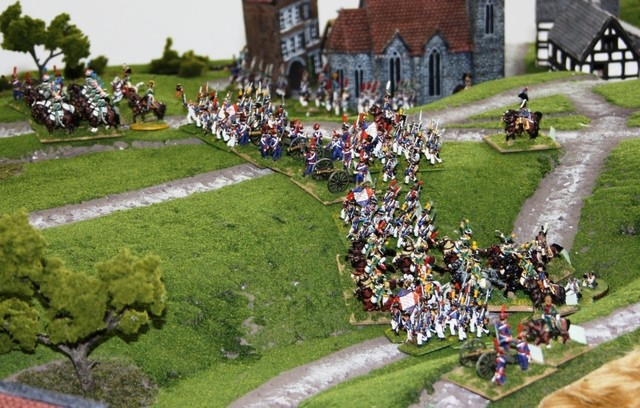
- Seeing the enemy withdraw, Milhaud orders his cuirassiers forward to glory! D’Erlon also moves Donzelot’s and Marcognet’s infantry forward, though Quiot and Durutte are still busy trying to take the farms. The Grand Battery now turns its attention to the eradication of La Haye Sainte.
- Another view of the advance of the French left wing.
- At last, under intense pressure, the Orange-Nassau Regiment finally breaks under the pressure and Papelotte-La Haye falls to Durutte’s infantry. Buoyed up by this success, the cavalry moves forward once again to engage the Allied left.
- Major Bäring’s garrison of La Haye Sainte is similarly coming under intense pressure and surely can’t hope to hold out much longer.
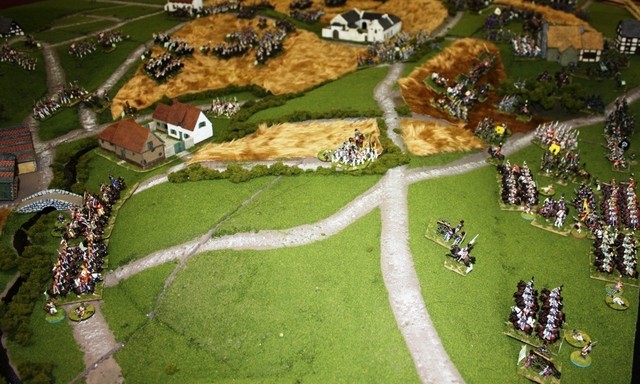
- To the western side of La Haye Sainte, the French mount a demonstration in an effort to dissuade the Allies from moving more reserves to the left. The French artillery meanwhile, is now starting to take a toll of the Allied artillery on the western side of the ridge.
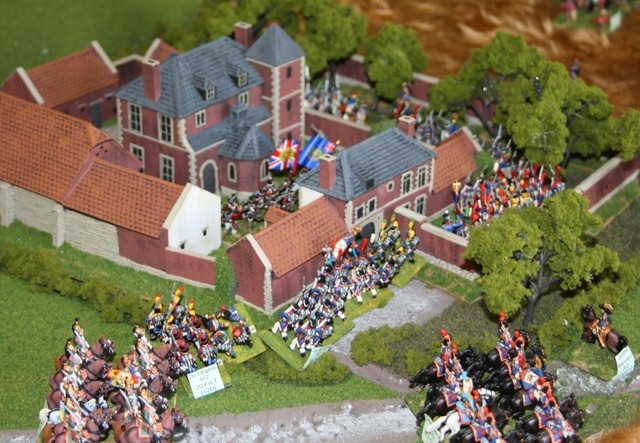
- Once again, the woods, gardens and orchards surrounding Hougoumont fill with French infantry as Foy and Jérôme have another crack at the farm.
- The time is now 2pm and one of Jacquinot’s scouts brings a prisoner to the Emperor… The Emperor swears… “I made one mistake; I should have burned Berlin!” Yes, Blücher’s Prussians are approaching!
- In response to the new Prussian threat, the bulk of Lobau’s 6th Corps is moved east to hold the high ground south of Frichermont. The two brigades of the Middle Guard meanwhile, are ordered to occupy Plancenoit.
- Things are looking bad for the Guards as a massive weight of fire whittles down their numbers. Some points of the defence start to waver and Byng pleads for reinforcements…

- In the nick of time and just as the Guards start to fold, Du Platt’s KGL brigade thickens the defences of Hougoumont.
- Having handed their positions over to the KGL, the few, shattered survivors of the Guards’ garrison withdraw through the North Gate.
- Things are really starting to heat up on the eastern half of the ridge. With Papelotte-La Haye taken and La Haye Sainte contained, the bulk of D’Erlon’s infantry is now committed to the assault on Picton. The Prussian threat now gives added urgency.
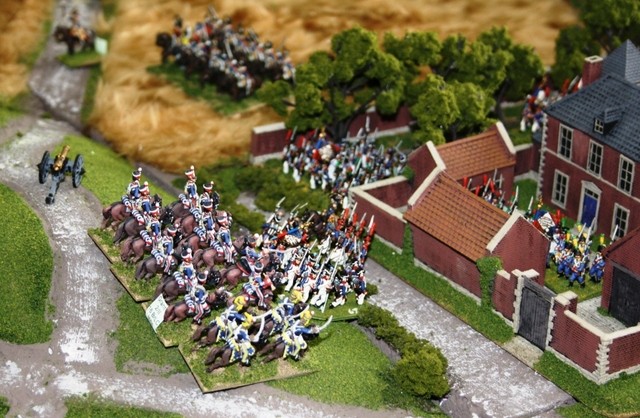
- Napoleon decides that he needs to decisively smash the weakened Allied left in order to separate them from the approaching Prussians. To that end, he orders Kellermann to transfer D’Hurbal’s heavy cavalry division over to the right wing.
- Seeing an opportunity, Milhaud personally leads forward the cuirassiers in a charge which breaks the two Hanoverian brigades on Picton’s left flank. However, the cuirassiers quickly run out of steam and are unable to exploit their small victory. Luckily for them, the Allied cavalry are still largely milling about in disorder and are unable to respond.
- This limited attack is soon followed up by a much heavier assault, as the Guard Light Cavalry surge over the ridge, accompanied by part of Durutte’s and Marcognet’s infantry divisions.
- Scenting victory, the Emperor orders the Young Guard forward to exploit the breakthrough.

- From Wellington’s viewpoint at Mont St Jean Farm, the situation looks desperate! With the Hanoverians already routing on the left, they are soon followed by the British and Netherlands light cavalry and the Nassauers, trapped in their squares while beset by French infantry, look set to break. The French are also closely following up with horse artillery, with the intention of blasting the survivors at close range! “Give me Blücher or give me night!”
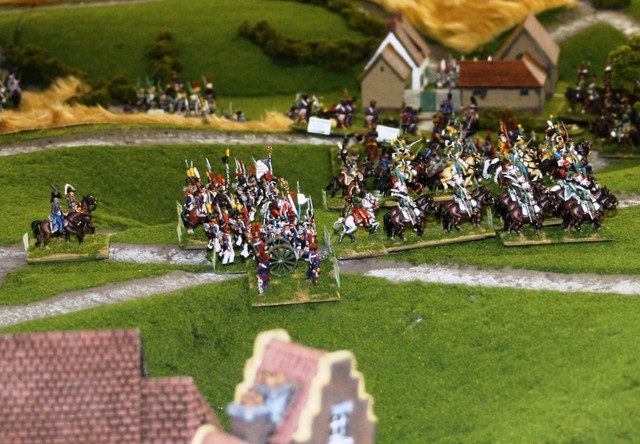
- But then a miracle… Tripp’s Carabiniers, having already halted one French cavalry attack, now spotted an opportunity. The French Guard Lancers, having broken Van Merlen’s light cavalry, had themselves become disordered in the melee… Tripp’s Carabiniers now charged, scattering the Guard Lancers like chaff! Maintaining their order, the Carabiniers charged on… through the Guard Chasseurs… Through both of Jacquinot’s cavalry brigades… Through a French infantry brigade… and on into the limbered Guard Horse Artillery batteries! Stunned at the disaster unfolding in front of him, General Delort led Farine’s cuirassiers forward in a desperate attempt to save the guns. Sadly, he too was defeated and the guns were lost! The Carabiniers had finally shot their bolt and withdrew, exhausted, with the cheers of the Allies ringing in their ears!
- Once again, the ridge becomes no-man’s land as both French and Allied cavalry rally. Durutte’s infantry, alone and isolated, suddenly feel very lonely…
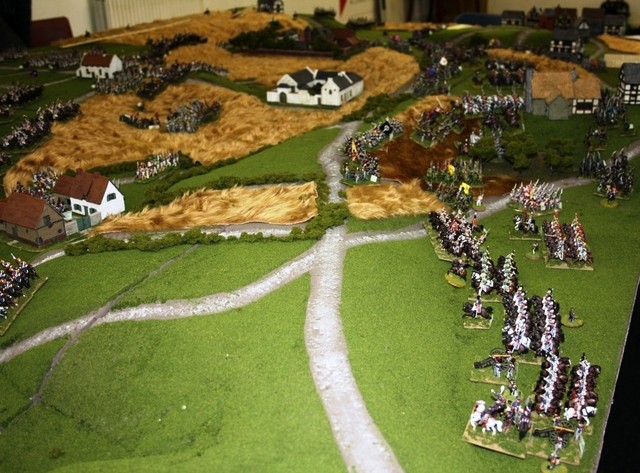
- Another view of the aftermath of the Carabiniers’ charge. The situation is still desperate for the Allies, with many of these units routed or disordered, though the Carabiniers have won them breathing-space and more time for the Prussians to link up with them.
- Another view of the aftermath: compare this with 52 above!
- With the Prussians approaching, Lobau is reinforced by his second division and a couple of 12-pounder batteries withdrawn from the Grand Battery. He is confident that he can hold Blücher long enough for the Emperor to win the battle.

- “There they are!” The Prussians emerge from the Paris Wood! Led by Prince William’s cavalry, the infantry ‘brigades’ (i.e. divisions) of Losthin (on the right) and Hiller (on the left) move forward to engage Lobau.
- However, Lobau is ready and meets the Prussians with artillery fire. Near Frichermont, Subervie’s cavalry moves forward to engage the Prussian dragoons.
- Losthin’s brigade approaches Frichermont.
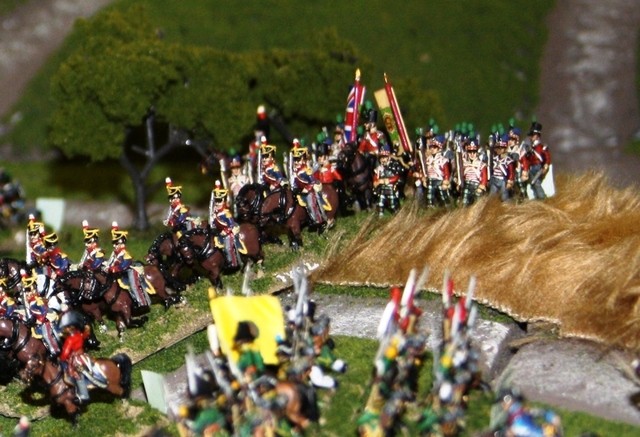
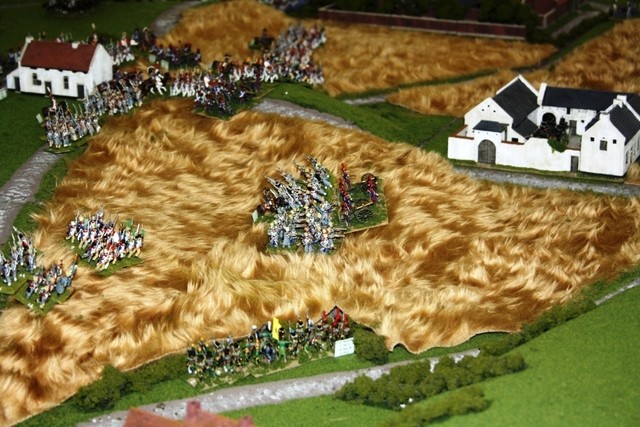
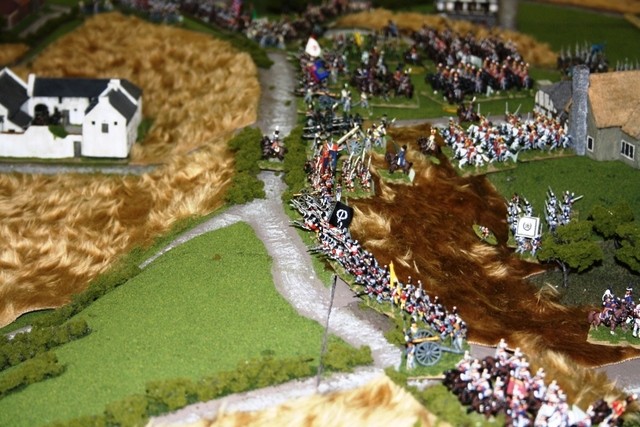
- Brolly firmly in hand, Sir Thomas Picton leads Dennis Pack’s brigade in a daring counter-attack against D’Erlon’s infantry along the sunken road! “Forward, ye rascals!”
- On their right, Ponsonby’s Union Brigade launches itself at the next French brigade. However, the French manage to form square in time.
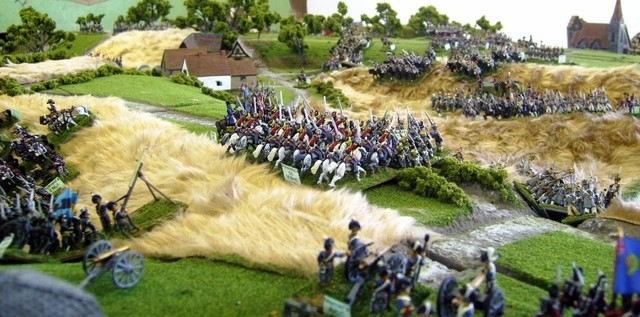
- Another view of the Union Brigade’s charge.
- “Scotland Forever!”
- “Come on, Scots Greys!”
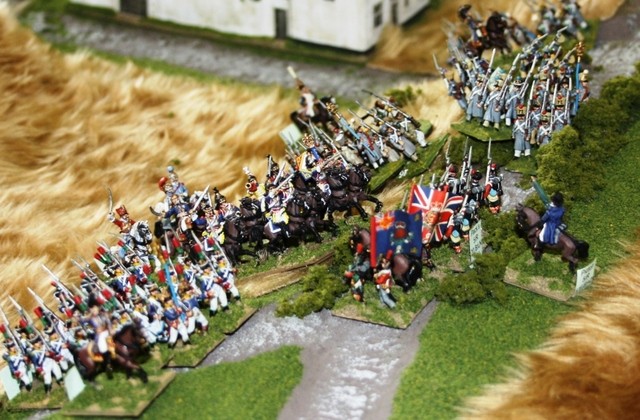
- While Picton’s attack is successful, Ponsonby’s dragoons are repulsed and Picton’s Highlanders soon draw unwanted attention from Marshal Ney, Vial’s cuirassiers and the Young Guard!
- Pack’s brigade is broken and the survivors flee to the safety of Mont St Jean Farm. Against all odds, Picton survives.
- Wellington takes personal control of the left wing as the situation once again looks desperate. The Brunswick Corps and the survivors of Perponcher’s Netherlands division now take over the defence of that sector from Picton’s shattered division.
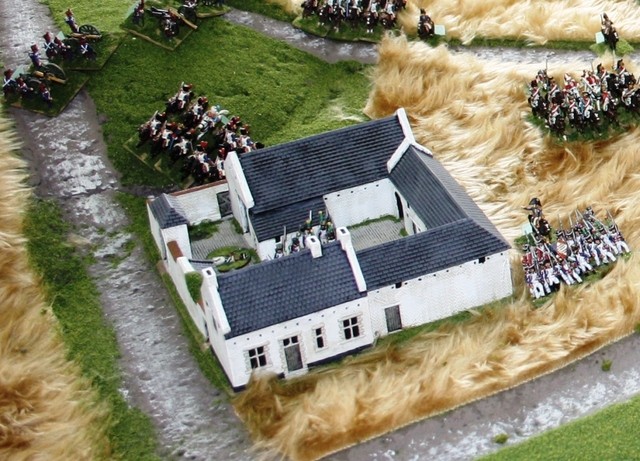
- On the western flank, things are also becoming unstuck for the Allies, as Du Platt’s KGL suffer heavy casualties in Hougoumont. Pleas for reinforcement this time go unanswered…
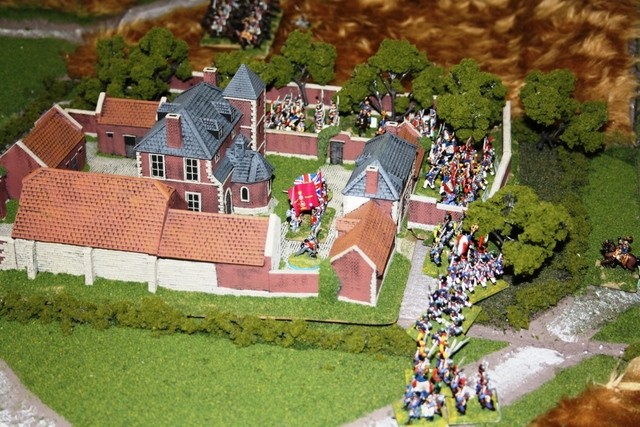
- As Guyot’s Guard Heavy Cavalry move east to join the assault on Picton, Jérôme’s and Foy’s infantry once again assault the walls of Hougoumont.
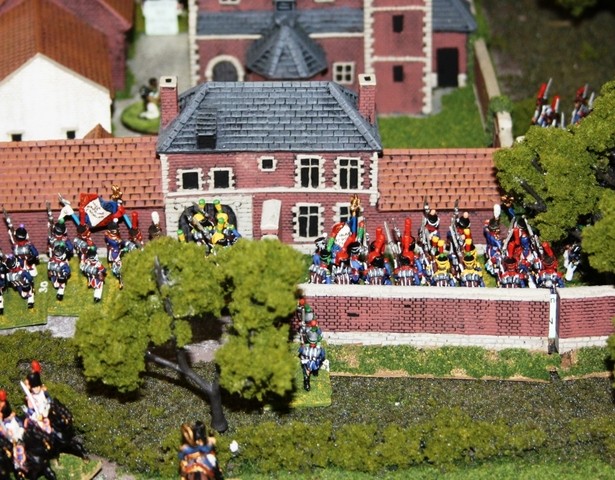
- This time, the defenders’ resolve fails as the French infantry smash their way in through doors, gates and windows.
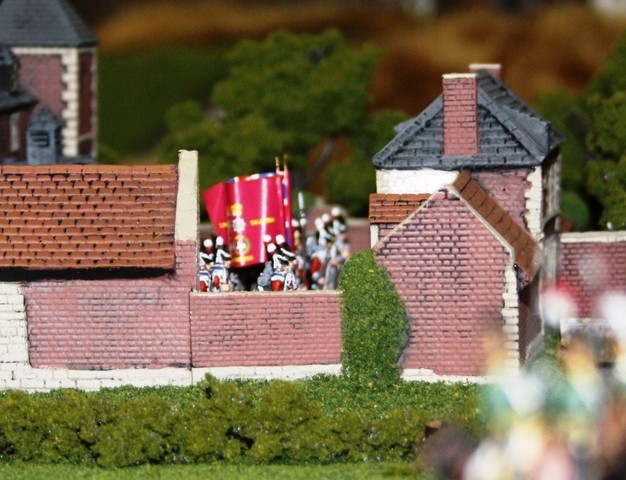
- Hougoumont Falls!
- The back of the KGL defence is broken as Foy’s men break in from the gardens. A horrified Lord Hill, expecting a fresh assault on the Allied right flank at any moment, organises a new defence line with Clinton’s division, Mitchell’s brigade and Grant’s hussar brigade. He pulls Chassé’s Netherlands division in from its remote position at Braine l’Alleud to form a reserve around Merbe-Braine.
- Back in the centre meanwhile, the Brunswicker Line Brigade mount a limited counter-attack on D’Erlon’s infantry, though are beaten off.

- The Young Guard surge over the hill, defeating the Brunswick Light Brigade with ease and smashing into Bijlandt’s Netherlanders.

- “They’re coming on in the same old way.” The French cavalry mount another attack on the Allied left, though are clearly starting to weaken. The heroic 2nd Nassau yet again form their squares and again beat off a cuirassier charge. However, Vandeleur’s Light Dragoons are routed by the Guard Chasseurs à Cheval (again), who charge on, routing the Brunswick cavalry, destroying a Hanoverian brigade and finally coming a cropper against the unlucky Dutch light cavalry, who finally send the Guard Chasseurs packing for a third time!
- In the centre, Marshal Ney leads Blanchard’s Carabinier brigade to glorious destruction. The Carabiniers are shot to bits by British artillery and ROCKETS (the shame…) before finally being destroyed by the Household Cavalry Brigade. Milhaud’s cuirassiers meanwhile, dash themselves to pieces against the Nassau squares. To add insult, Milhaud is captured by the Nassauers… However, the Young Guard continue their glorious advance; routing Bijlandt’s brigade and the remains of the Brunswick Corps and almost capturing Wellington.
- “Come and see how a Marshal of France dies!”
“But Sir, I think you’ll find that you’re a Marshal of the Empire, not a Marshal of France…”
“Shut up Capitaine Le Pédant!”
- With boundless energy and not a little desperation, Wellington organises Lambert’s brigade, the 2nd Nassau and the remnants of the Brunswick Corps into a new defence line against the Young Guard.
- Finding themselves fighting alone, the Young Guard appeal for reinforcements. However, the remnants of D’Erlon’s Corps, Milhaud’s Cavalry Corps and the Young Guard Cavalry are still rallying and can offer no immediate help. The Emperor orders the Guard Heavy Cavalry Division and the Old Guard forward…
- La Haye Sainte falls! At last, the farm falls to an assault by Bachelu’s division! Bachelu pushes through to threaten the Allied centre.
- More Prussians arrive; Bülow’s artillery reserve follows Losthin’s brigade, while Hacke’s infantry brigade follows. Ryssel’s infantry brigade seems to have got itself lost…
- Losthin’s 18th Infantry Regiment occupies Frichermont-Smohain without resistance. However, a desultory and ineffectual exchange of fire soon develops across the stream with Durutte’s infantry in Papelotte-La Haye.
- Meanwhile, back at the ranch… Foy’s division attempts to advance from Hougoumont, though runs straight into Grant’s hussars. Successfully forming square, the French infantry deliver volleys into the hussars until they go away.
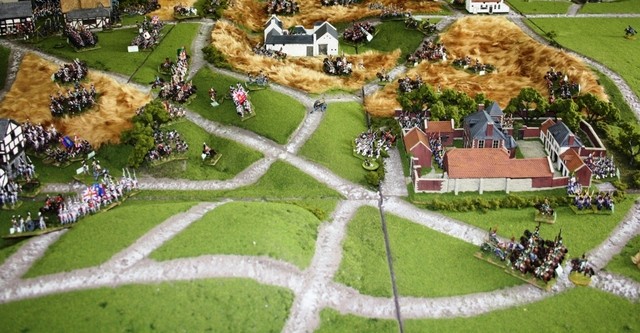
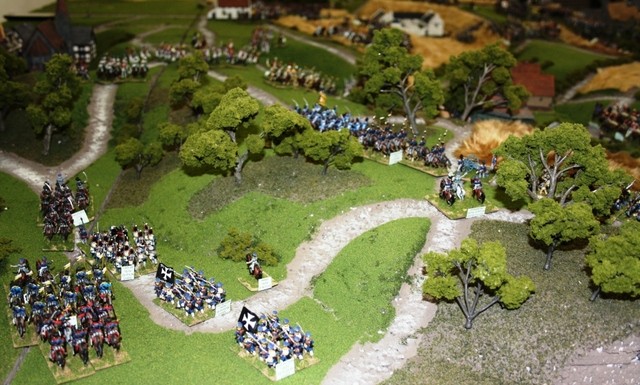
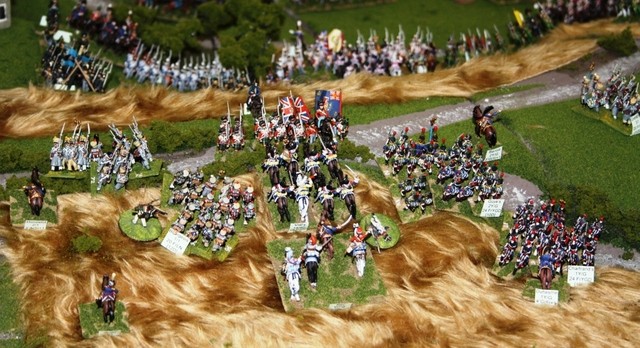
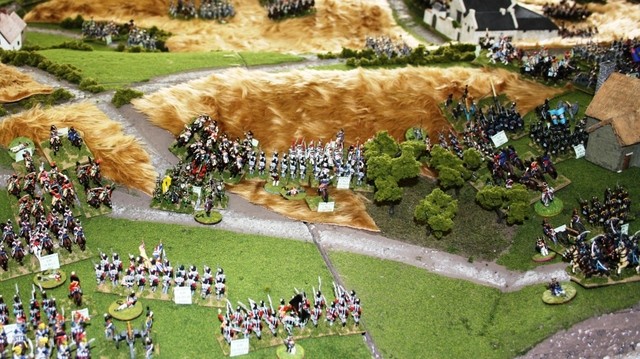
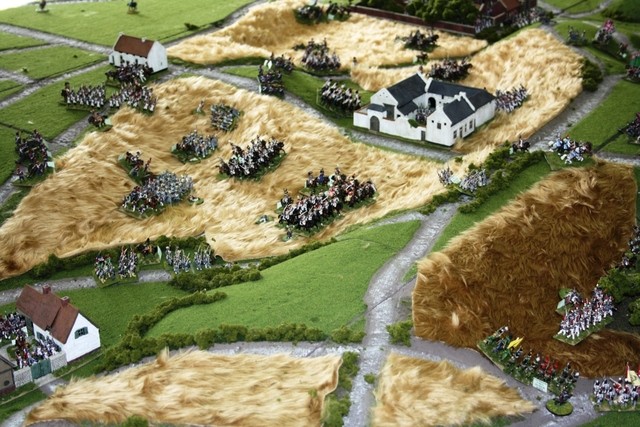
- An overview of the situation on the western flank.
- The first clash against the Prussians results in a minor French victory! Subervie’s light cavalry charge Prince William’s dragoons, routing them along with two brigades of Landwehr Cavalry. Regaining control of his men, Subervie withdraws in good order to the safety of Lobau’s infantry lines.
- The French Guard Lancers, rallying near Papelotte following the cavalry battle on the ridge, are most surprised to come under fire from their rear! The accurate massed Prussian 12-pounder artillery causes carnage among the lancers and renders them hors de combat.
- Near Plancenoit, Domon’s horse artillery manages to cause significant damage to the approaching Prussians. The Prussian infantry therefore take to the woods, moving to outflank Domon’s cavalry and the irritating horse battery.
- As the artillery opens fire on the approaching Prussians, Lobau’s infantry are content to wait for Blücher to come to them.
- Hiller’s Silesian Landwehr take advantage of the cover provided by the woods to work their way within musket-range of Domon’s gunners.
- In the Allied centre, Maitland’s Guards still stand firm and wait for the French to attack from Hougoumont.
Sadly that’s the last photo I took (idiot), though we had reached the end of our playing time (at around 1830hrs game time). At the end of the battle, the situation was as follows:
- D’Erlon’s Corps had suffered heavy casualties and was no longer battle worthy. Jacquinot’s cavalry had been eliminated. It was no longer capable of carrying on offensive action against the Allied left.
- Milhaud’s Cavalry Corps was hors de combat.
- Kellermann’s Cavalry Corps had suffered heavy casualties, though still had one fresh cuirassier brigade.
- Reille’s Corps had suffered moderate casualties, though faced the strongest part of the Allied line, which was mostly still fresh, though lacking in artillery. Piré’s cavalry division had lost one of its two brigades.
- Lobau’s Corps had suffered only light casualties, though was facing ever-increasing numbers of Prussians.
- The Guard Light Cavalry Division was hors de combat.
- The Young Guard had suffered only light casualties, though was isolated and facing increasing organised opposition, with little hope of rapid support.
- The remainder of the Guard was still fresh – the Middle Guard was holding Plancenoit, while the Old Guard and Guard Heavy Cavalry were moving to reinforce the Young Guard’s attack.
- The Allied left wing (Picton’s Division, Lambert’s Division, Perponcher’s Division, Vivian’s Cavalry Brigade and Vandeleur’s Cavalry Brigade) had suffered very heavy casualties, though was still holding on (just). Lambert’s brigade in particular, was still virtually unharmed and was in a position to launch an effective counter against the Young Guard.
- Kruse’s Nassau Reserve Contingent, which had been moved to the left, had suffered only moderate casualties.
- The Brunswick Corps, which had been moved to the left, had suffered moderate casualties, though was largely routed.
- The Netherlands Cavalry Division had suffered heavy casualties and was virtually hors de combat.
- Aside from the loss of the La Haye Sainte garrison and most of its artillery, Alten’s Division had suffered only light casualties.
- Cooke’s Division had lost Byng’s Brigade and most of its artillery, though Maitland’s Brigade remained fresh.
- Clinton’s Division had suffered heavy casualties in Du Platt’s KGL Brigade and artillery, though otherwise remained fresh. It had shifted its position to face the new threat from Hougoumont.
- Mitchell’s Brigade had suffered light casualties, though had withdrawn, under the command of Lord Hill, to the safety of Clinton’s Division.
- Chassé’s Netherlands Division remained fresh, though had been pulled in to create a reserve at Merbe-Braine.
- Uxbridge’s Cavalry Reserve was a mixed bag: Vivian’s and Vandeleur’s Brigades had suffered heavy casualties, Ponsonby’s Brigade had suffered moderate casualties, Grant’s Brigade had light casualties and the rest were still fresh.
- While Prince William’s cavalry had been repulsed in the initial clash, Prussian casualties were still very light. Their numbers were rapidly increasing and they would soon have overwhelming numbers with which to push back Lobau. Ryssel’s infantry had finally arrived (late) to reinforce Bülow’s 4th Corps, closely followed by the advance elements of Pirch’s 2nd Corps. Additionally, the advance elements of Zeithen’s 1st Corps had arrived early on the Ohain road, relieving Colläert’s Netherlands Cavalry Division.
So the Allies were battered but not beaten – especially not on their right. The loss of the farms meant relatively little, as the French still had to take the main position on the ridge beyond.
A further push on the Allied centre-left by the Guard and the surviving heavy cavalry could probably have won that sector of the battlefield, though they would then have Zeithen’s Prussians at their back and would still have to take on the strong Allied right wing. While he still held Papelotte-La Haye, D’Erlon had virtually nothing left and his only possible course of action would be to attempt a delaying action against Zeithen in the Papelotte area.
An all-out attack by Reille would depend upon sheer luck to succeed, though was possibly the only option left to Napoleon. The Emperor would also have to hope that Lobau and the Middle Guard could hold off the Prussians long enough for Reille and the Guard to do their job…
Napoleon wasn’t confident!
A shame we had to end it there. With luck we might be able to play out the final act in the near future. Just for once I’d like to get the Prussians properly rolling!
Thanks to all who took part: Gareth Beamish, Will Poole, Martin Small, Chris Simmonds and Jase Evans.
My thanks also to Oliver Crees, Will Poole, Martin Small and Carwyn Savins for their assistance in building the terrain and to my wife Sue for merely tolerating my eccentricities and expenditure on such things…
The models are all from my collection. Mostly AB figures 15mm, with a few units by Old Glory 15s. Mostly painted by me, though with a few painted by Gareth Beamish.
The fortified farms are by Tiger Terrain. Other buildings are a mixture of buildings by The Drum, Hovels and scratch-built buildings by Gareth Beamish. Trees are Woodland Scenics kits, built and supplied by Martin Small.
Rules used are ‘Napoleon’s Battles’ 1st Edition by Bob Coggins (Avalon Hill), with one or two modifications of our own. In these ‘higher level’ rules, each unit represents a brigade (or large regiment) and each gun model represents a horse or heavy foot battery (light/medium foot batteries and skirmishers being factored in to brigade firepower).
